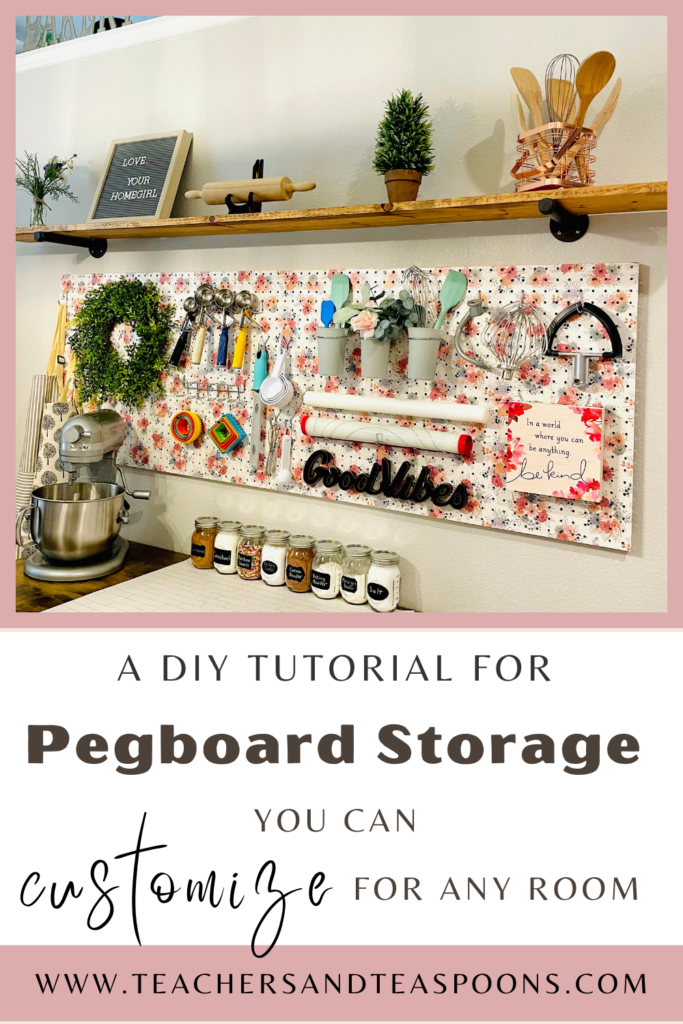
Oh man, do I have the niftiest, coolest, easily customizable storage system idea for you!
This pegboard wall storage idea can work wonders in a cookie or craft room, but it can honestly bring ANY room back to life when it comes to aesthetically pleasing organization.

In this post, I’m going to tell you how (and SHOW you how with the video tutorial linked below) I repurposed a large piece of pegboard into the most beautiful wall storage for many of my baking tools.
Again, the customization options here are endless, and this pegboard is such a versatile storage tool that can be used for so many different things. I highly, highly recommend that you entertain this as an option if you have things to store!
This post contains affiliate links, which means that if you decide to click and make a product purchase, I may make a small commission at no additional cost to you. I truly appreciate your support!
Supplies you’ll need:
- Pegboard: I bought a 4 foot by 8 foot sheet of white pegboard at Home Depot, and had them cut it down to roughly 2′ X 6′ to fit my wall space. I think the entire sheet was about $25 bucks, which is super affordable!
- Paper: You can use many different kinds of thin paper here, but I chose the floral patterned wrapping paper pictured below. I found it at Hobby Lobby, and it was super simple to work with for this project. Just note that the thicker the paper medium, the more trouble you might have with it sticking to the pegboard.

- Mod Podge: I picked up this MOD PODGE MATTE FINISH bottle, and it worked very well.
- Small Roller Brush and Handle: Something like this PAINT TRAY SET is all you would need.
- Iron (no steam)
- Parchment Paper
- Scissors
- Piece of SANDPAPER
- Mechanical Pencil
- 2, 1 X 2 furring strips
- Drywall/Stud screws and anchors
- Screws to attach pegboard to furring strips
- Drill
- PEGBOARD HANGING ACCESSORIES

Directions:
- Lay down a sheet or tarp underneath your piece of pegboard.
- Using your roller paint brush, roll a coat of Mod Podge onto your pegboard. Make sure you coat the edges well, too. (A roller brush works best here. If you were to use a regular paint brush, the Mod Podge would pool inside the pegboard holes).

- Roll one more coat of Mod Podge over the first coat.
- Let Mod Podge dry for 1-2 hours.
- Spread your paper over your pegboard area and cut to size with some overhang.

- Heat your iron to a high setting, but make sure there is no water in it to prevent any steam.
- Place a piece of parchment paper down over your paper, and go back and forth the covered area. This will heat the Mod Podge underneath your paper, which will make your paper adhere to the pegboard.

- Repeat this process until you have ironed/sealed all areas of your pegboard.
- Using a piece of sandpaper, carefully run it along the perimeter of your pegboard. This will scrape off your excess paper and leave a smooth, seamless edge.

- Using a mechanical pencil, carefully poke through all the pegboard holes. It’s easy to see them underneath your paper, so you don’t have to hunt for them. Just poke through, then do a circular motion to smooth out the edges of the holes.

Hanging Pegboard:
- In order to leave room behind your pegboard for the accessories to hang correctly through the holes, you need to hang furring strips first to offset the board from the wall a little bit. If you don’t do this step, your accessories will not have room to hang through the pegboard holes.
- My furring strips were the same length as my board and were drilled into studs in the wall before hanging the pegboard. It allowed my board to sit about an inch off the wall so the hooks could go through as needed.

- Once furring strips are secured into the wall, it’s time to screw your pegboard into your furring strips.
- There will be a few unusable holes at the top and bottom in your pegboard due to your furring strips but, as you can see below, it doesn’t really matter! I’m in love!

Voila! You have a beautiful wall storage center you can make your own. It’s that simple!
If you would like to view the video tutorial of this process, please see the YouTube link below.
Again, I used this to organize several baking tools in my cookie room, but this storage idea can be used for ANY room!
I hope you enjoyed this DIY craft. I would absolutely LOVE to see any pegboards you create using this method. Please feel free to send me your creations!
What a clever and resourceful idea! I love the finished project!! Thanks for sharing the video tutorial as well. It is very helpful.
Thank you so much! I’m so happy you found this helpful! 🙂
This is great! Thank you, I love pegboards for storage but I have never seen one so pretty 🤩
You are so welcome! It’s my favorite addition to my cookie decorating room, ha! Thanks, again! 🙂